2023-05-15, 12:19 AM
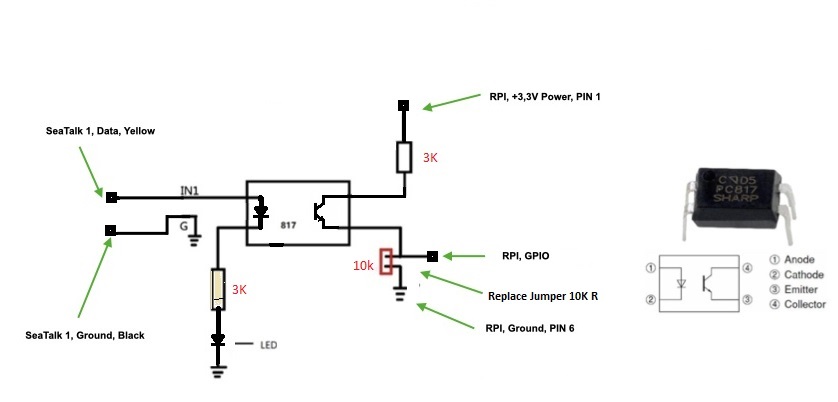
Seatalk one interface.
I have noticed there are a lot of different installs of the Seatalk 1 interface, I was not able to get a hold of the board most people are using and found this on on Ebay for a couple of dollars. I didn't have to do much of a modification to get it going other than to replace the on board jumper for a 10 K resistor, and this way I can use the terminal blocks on the board and no external resistors were necessary. The board is shown at the bottom of the page, the LED blinks when the Seatalk data is active.
This was a simple job and I hope it help make it easy for others.
Only those who go too far can possibly tell you how far one can go
Our Blog: svmatilda.com
Our Blog: svmatilda.com


